WESTPORT TERMINAL RR |
new Feb 2006 |
[How to scratch build turnouts] and [crossings] [Manual thrown Peco turnouts] [switch stands] [Movable magnets] [DCC] [beacon light] [CB&Q 173] [RS-1 and weathering] [tender pick up 0-8-0] [ Track Cleaning Transfer Caboose ] [ Signal Bridge ] [Operation] [Way of Hopper BN 25 3 84] [WT RR industries shipping & receiving] download Excel [carcards&waybills] 900kB [staging] [Harbor District] [Plywood District] [Third Street Industrial District] [track scale, structures] [Operating gates] [Waterfront Structures] [trestle] [Interchange Cars] [car exchange] [pass exchange] [electronic rail pass ] [ video ] |
how to - weathering
deutsch 
how I learned from my friend Pete
with chalks
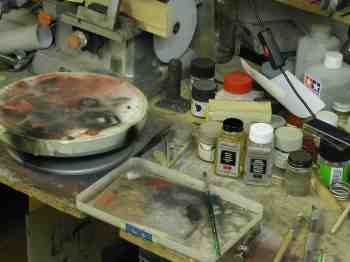
The equippment: sanding paper, toilet paper, micro bushes and paint brushes,
and chalk, of course. different chalks. Mostly grey and red.
At first after masking, air brush the model with dullcote. Chalk will not
stick very well at clear plastic. You see my worktable with "turntable",
borrowed from my wife's clay working.
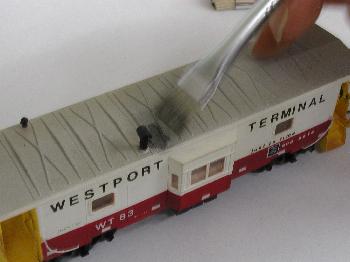
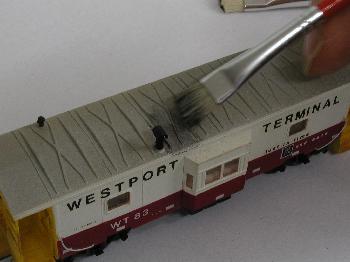
You dip the brush at the fine chalk dust, wip over the paper until its nearly clean and brush onto the model. Distribute it a little bit, in vertical direction. Same procedure again and again. With the micro brushes you can get fine rust streaks.
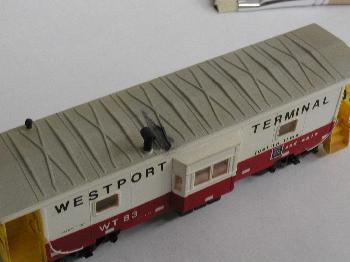
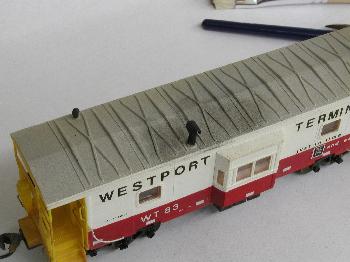
Here're two steps. You should repeat working with chalk as long as you want. When you're satisfied again a layer of dullcote. Spray gently, heavy spraying will distribute the chalk from the model.

The truck side frames and the lower shell got a air brush spray with buff and earth.

with felt tip pens
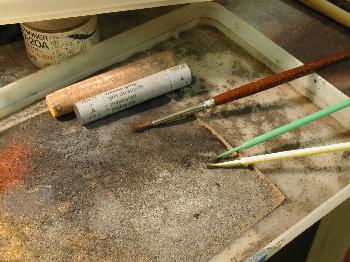
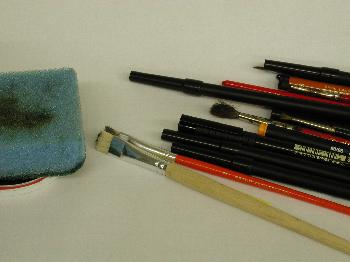
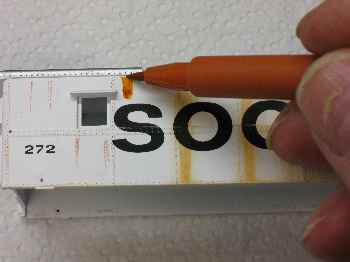
The equippment: An assortment of felt tip pens and brushes, LYRA AQUA BRUSH and
Faber Castell Pitt Artist Pens. Also the above mentioned toilet paper and
a sponge. You have to test some time until you have a suitable pen type.
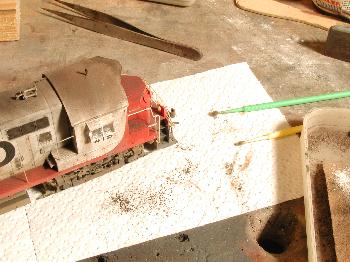
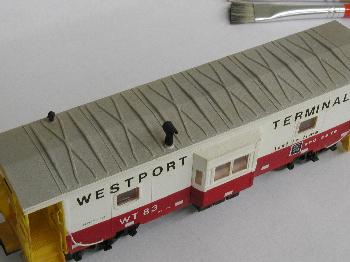
The second picture shows the painted car. It must not have been dullcoted.
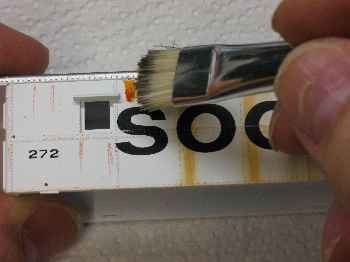
The first stroke with the pen, I used the black color. Then came the brush - a hard brush - to work. You press a little bit and rub the color.
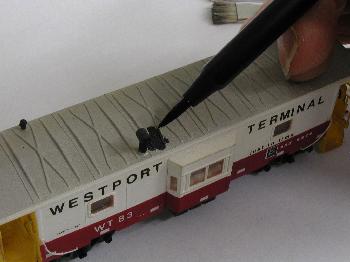
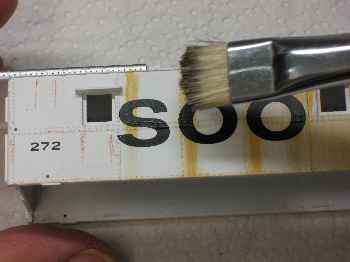
The color will spread out. If it's still too hard you wet the brush a little bit. (The sponge!) Then you dry the brush at the toilet paper until it is "nearly" dry. Then you can distribute the color. It will disperse. With more water you can remove the color, at least for some time.
Here's the car at the end of the first step. Some have to follow!
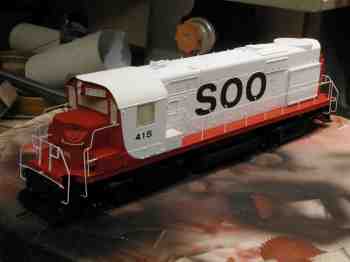
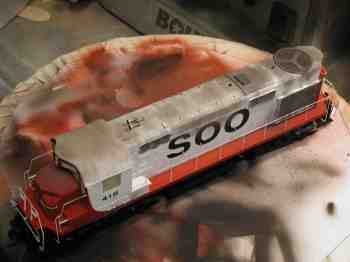
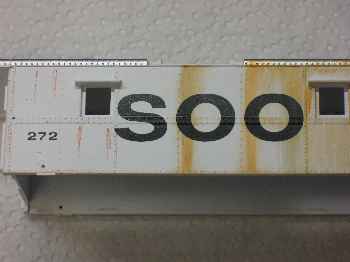
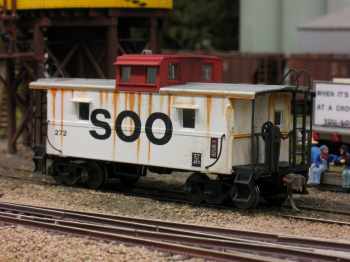
And with an old SOO caboose:
And then I've used a straightedge.
| [How to scratch build turnouts] and [crossings] [Manual thrown Peco turnouts] [switch stands] [Movable magnets] [DCC] [beacon light] [CB&Q 173] [RS-1 and weathering] [tender pick up 0-8-0] [ Track Cleaning Transfer Caboose ] [ Signal Bridge ] [Operation] [Way of Hopper BN 25 3 84] [WT RR industries shipping & receiving] download Excel [carcards&waybills] 900kB [staging] [Harbor District] [Plywood District] [Third Street Industrial District] [track scale, structures] [Operating gates] [Waterfront Structures] [trestle] [Interchange Cars] [car exchange] [pass exchange] [electronic rail pass ] [ video ] |