WESTPORT TERMINAL RR |
BLT Dec 03 update Aug 07 |
[How to scratch build turnouts] and [crossings] [Manual thrown Peco turnouts] [switch stands] [Movable magnets] [DCC] [beacon light] [CB&Q 173] [RS-1 and weathering] [tender pick up 0-8-0] [ Track Cleaning Transfer Caboose ] [ Signal Bridge ] [Operation] [Way of Hopper BN 25 3 84] [WT RR industries shipping & receiving] download Excel [carcards&waybills] 900kB [staging] [Harbor District] [Plywood District] [Third Street Industrial District] [track scale, structures] [Operating gates] [Waterfront Structures] [trestle] [Interchange Cars] [car exchange] [pass exchange] [electronic rail pass ] [ video ] |
manual turnout actuation
Diese Seite auch auf
Deutsch. ![]()
In September 1987 you could see the first operational modul of Naumburg in the guest-house of the city of Unna at a Fremotreffen. The first article was written in Hp1, I 88, "manual turnout actuation for Naumburg".
Now it's time for an update on my latest version. I've seen many versions since that time. And it's always very interesting for me to look under the modules.
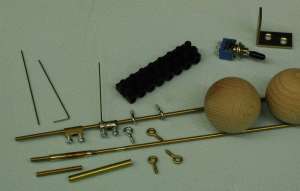
Materials:
brass tube 6mm,
brass sheet,
steel wire 1mm, the type Sommerfeld sells for it's catenary,a two position switch and an bracket
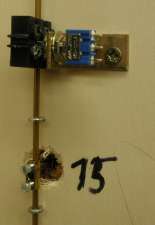
The fascia gets a hole. This hole works as duct for the tube at one end. A similiar method is used at the other end. The front end of the tube gets an threaded rod which caries the wooden ball.
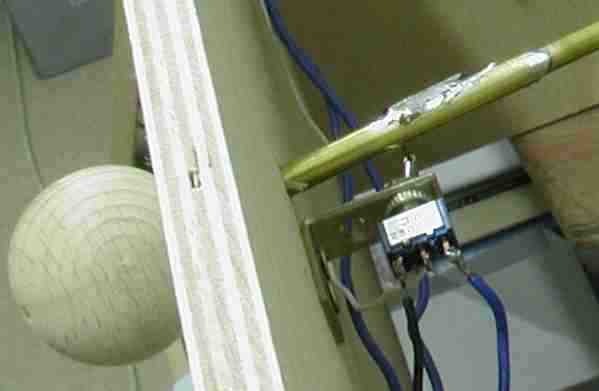
The lever of the switch gets an 1 mm hole. The switch is fastened onto the bracket. Now I can look for the position. The hole of the level should be concentrical under the tube. This is the best place and the tube gets now its hole, too. The distance between level and tube should be small.
Are all holes prepeared can the bracket and the switch fastened. The connection between tube and level happens with a piece of wire. I solder this wire angle with a torch or a heavy soldering gun. This was the first part.
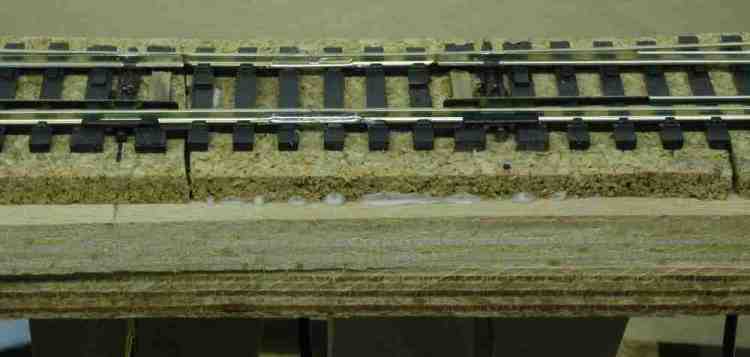
Now I solder anther piece of wire to a sheet of brass. This sheet comes up to the plywood. The wire is longer and goes through the tie. You may shorten it later.
Everything is ready to adjust. The switch is in one position, also the turnout. The sheet of brass is clamped to the tube. So you can it adjust easily. Are the points also correct in the end position? Then you can solder brass sheet and tube.
Last point, you can wire the switch.
The Peco turnouts are nearly DCC friendly. I made a few modifications. At first I cut the two wires between closure rails and frog. The frog will be wired via switch!
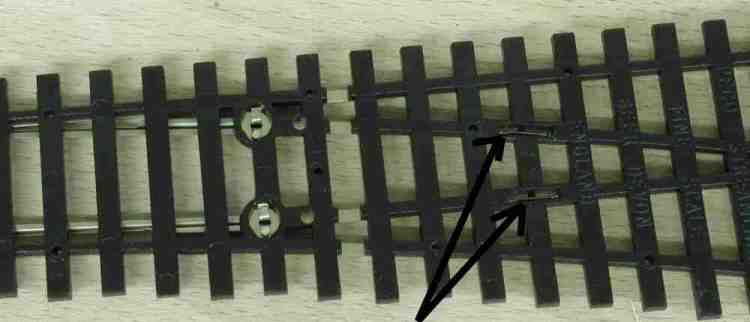
Now, the closure rails would be provided with current only via points. This is not sure. Especially if the rails are weathered. So I made a connection between closure rails and stock rails:
And to get a troubleless turnout I make another connection between closure rails and points. Therefore I use a piece of wire left over from relays. This is very thin and flexible! For a better appearance I cut all the unneeded parts around the throw bar and replace the gap with a wooden tie.
More information at Allan Gartner's Wirring for DCC.
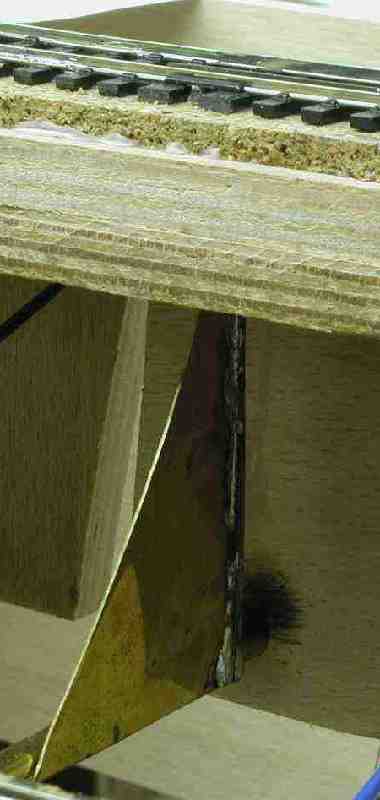
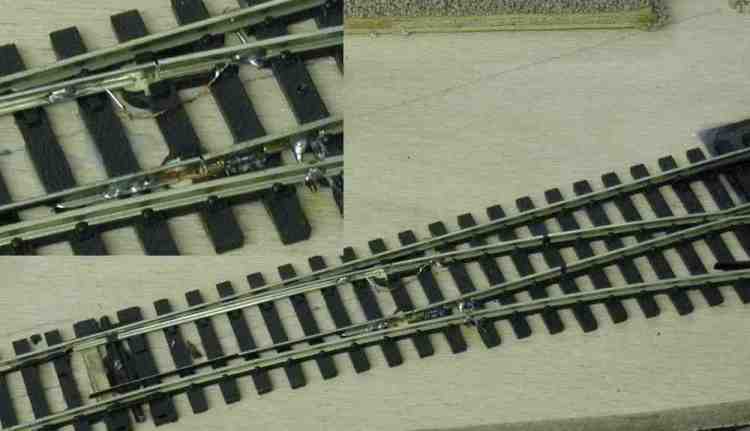
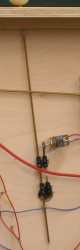
And the latest idea for manual turnout throwing:
I use the insulating screw joints without the plastic insulation. I've soldered spring steel wire to the joints, like in the left picture. The wire throws the tie. With the two screws it's very easy adjustable. Two half joint frames the frog switch. Also easy adjustable. If I push the brass tube, the switch will go to the other pole and the tube moves the joint for the tie.
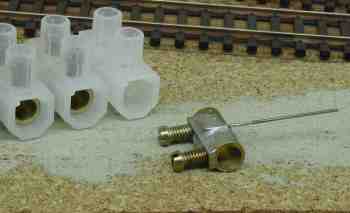

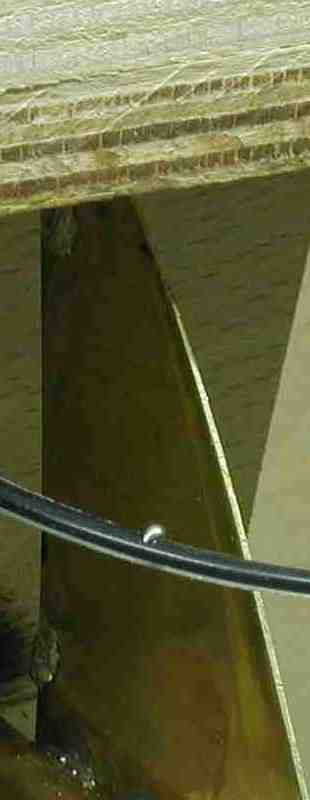
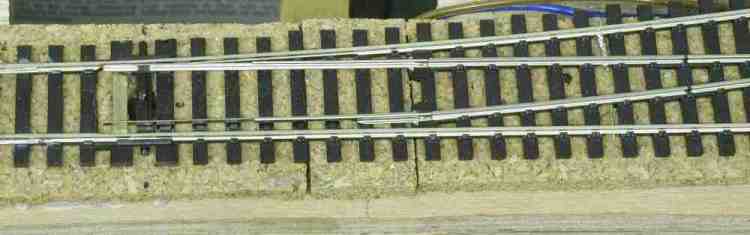
At my new Westport I build a fast and simple way. These are the parts and the under layout device:

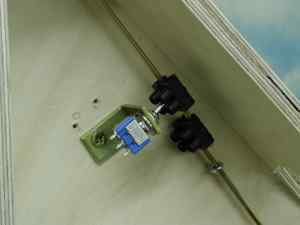
All together under segment 5 at Diamond Valley, you see the latest idea for the switch:
And in scenery you have movable
switch stands. ![]()
Still any questions? Write to Wolfgang Dudler
next top
| [How to scratch build turnouts] and [crossings] [Manual thrown Peco turnouts] [switch stands] [Movable magnets] [DCC] [beacon light] [CB&Q 173] [RS-1 and weathering] [tender pick up 0-8-0] [ Track Cleaning Transfer Caboose ] [ Signal Bridge ] [Operation] [Way of Hopper BN 25 3 84] [WT RR industries shipping & receiving] download Excel [carcards&waybills] 900kB [staging] [Harbor District] [Plywood District] [Third Street Industrial District] [track scale, structures] [Operating gates] [Waterfront Structures] [trestle] [Interchange Cars] [car exchange] [pass exchange] [electronic rail pass ] [ video ] |